


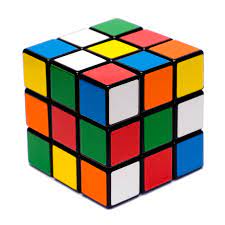
Our Enduring Attraction To Solving The Puzzle We Call Rubik’s Cube
Wikimeda Commons
May 16, 2023
By Collin Greer
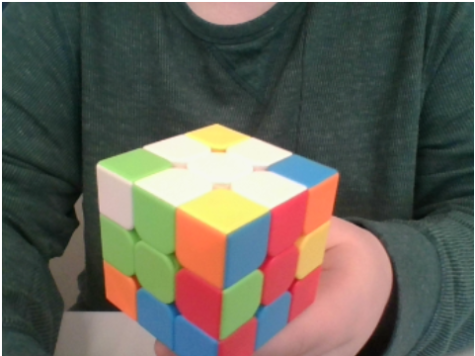
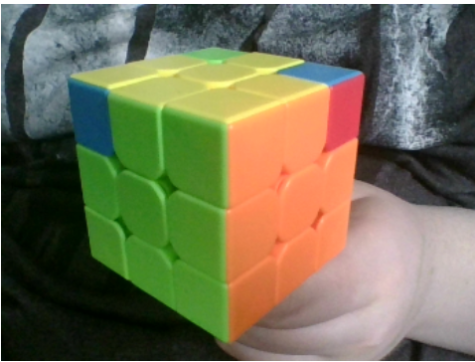
The nearly 50 year old Rubik’s Cube is one of the most fascinating puzzles we have today. Available since its debut in 1974, the nearly 50-year-old puzzle named for its creator is still available in many retail stores across the world. Despite its widespread popularity, however, many people still don’t know how to solve the cube, which means successfully moving the pieces of the puzzle until all six sides of the cube are monochromatic.
At first glance, this challenge can be pretty daunting, however, the method for solving the cube is actually a lot easier than you might think.
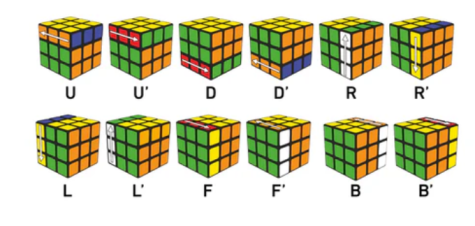
Before we get into the first step however, you should first familiarize yourself with the moves that you will need to know in order to follow the steps in this article. See Figure A. This chart displays the names of each move and the corresponding movement of the pieces on the cube.
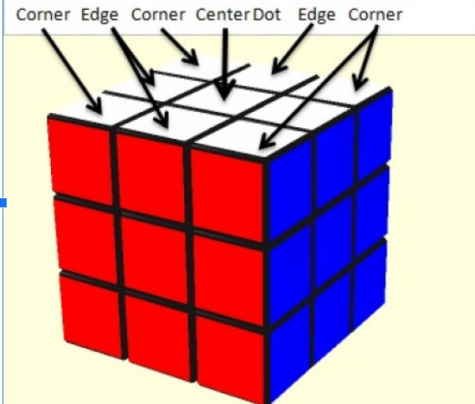
Next we want to familiarize ourselves with the pieces on the cube. (Figure B)
Edge pieces are the pieces with two sides, corner pieces have 3 sides, and center pieces have only one side.
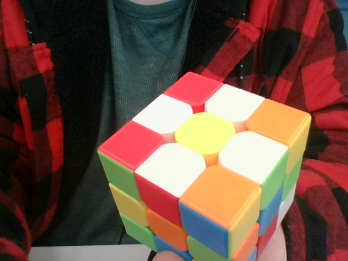
Now we are ready to move on to step one. For this step, we are going to make something called the Daisy. To do this, we are going to need to take all four of the edge pieces with white on them, and put them all around the yellow center piece, so that it looks like a daisy. (Figure C).
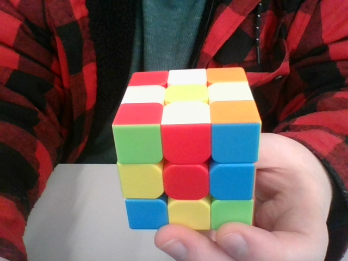
For the next step, we want to take the edge pieces, and match up the sides that are NOT white, (red, orange, green, and blue), and match them with their respective center pieces. This needs to be done one at a time, and each time you match an edge to a center, you need to shift that side of the cube 180 degrees so that the white edge piece is on the bottom. (Figure D)
As you can see here, I matched the red and white edge piece to the red center piece, and then rotated that side of the cube 180 degrees so that the white and red edge piece is now touching the white center piece. Once you do this for all four edge pieces, you should have a white cross, as seen below, with the edge pieces matching the center pieces. (Figure E)
Once you have this step done, turn the whole cube over so the yellow center piece is on the top. Then, find the corner pieces with white sides on them, and turn the top face, so that the other two colors on the corner piece are lined up at the corner of those two colors. For example, in the picture below, you can see that the orange, green, and white corner piece is between the red and blue centers at first.
Once it’s matched up, you must execute the following algorithm. R, U, R’, U’
You may have to repeat it, up to 4 times before the corner is put into place. Once it is in its proper place, it should look like this (Figure F)
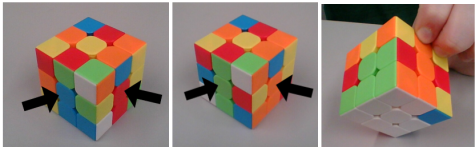
Figure FRepeat this for all of the corner pieces with white on them. Once it is finished, the bottom part of the cube should be completely white.
Next, in order to solve the second layer, we have to slot the remaining edge pieces into their correct places. To do this, we need to take an edge piece from the top layer that does not have yellow on it, and turn the top face so that this piece is forming a uniform, diagonal line on the side of the cube with its corresponding center piece, as seen in Figure G.
Once this is done, look at the other color on the edge piece. Then see if the edge piece needs to go to the right or to the left. Depending on which direction it needs to go, you will need to turn the top face in the opposite direction. If it needs to go right, turn the top face 90 degrees counterclockwise. If it needs to go to the left, turn it 90 degrees clockwise. Then, repeat the following algorithm. This should slot the edge piece into the correct place.
Right: L’, U’, L, U, F, U, F’
Left: R, U’, R’, F, U, F’
If there is an edge piece that you need to get to, that is not on the top layer, but is in the wrong place, repeat this algorithm to displace the white corner directly beneath it, don’t fret, we’ll put it back in one second.
R, U, R’, U’
When this is done, you should be able to repeat the white corner algorithm from earlier to put the corner piece back, and the edge piece that was stuck should now be free for you to manipulate. Once you have solved the second layer, it should look like Figure H.
Now, we’re on the last few steps of the Rubik’s Cube. This next one is called the “Yellow Cross”. (See Figure I) This is similar to the white cross, except there is a specific algorithm to create this cross. There are a few stages that the yellow side could be in when you start this step.

If you start this step with a yellow cross, you’re lucky! You get to skip this step. The rest of you need to orient the cube so that you are looking at the yellow side from the same viewpoint as in the pictures above. This way, the yellow center is on top. Then, execute the following algorithm. (You may have to repeat this process. Eventually you will get the yellow cross.)
F, R, U, R’, U’, F’
Next, we need to make sure that the edge pieces on the top layer match the center of each side. (Figure J)
As you can see, some of the edge pieces do not match. We can fix this by repeating the following algorithm very carefully. R, U, R’ U, R, U, U, R’
If you get to a place where there are two edge pieces in the right place, and two that are not, turn the cube so that you are facing it in the way that you see in the photo above. Then, repeat the algorithm from above to put the edge pieces in the right places.
For the second to last step, we need to put the yellow corner pieces in the correct spots, so that we can solve them in the next step. For this, find a corner with the right colors on it that match the three sides that surround it.
U, R, U’, L’, U, R’, U’, L
Execute the above algorithm in order to put the yellow corners in place.
Once you have the yellow corners in their correct places, its time to reorient them, putting them in their correct configurations, and solving the cube.
For this step, one or more of the corners may already be solved. If this is the case, orient the cube to you so that you are looking at from the same perspective of Figure K.
The solved corner should be to the left. (Figure L) Once you’ve done this, execute the following algorithm.
R’, D’, R, D
It’s going to look like you messed up the cube, but don’t fret, if you followed the algorithm, you’re doing well. Once you have solved one corner, turn the top layer of the cube 90 degrees clockwise to bring up the next corner that you need to solve, then, execute the same algorithm as before. Once you have done this for all of the unsolved corners, the cube should be solved.
Congratulations! You now have the fundamental process of solving the Rubik’s Cube mastered.